
DIY Easy Mason Jar Decorating Tutorials
Mason jars are great for DIY projects. They are simple, affordable, and fun to decorate. With just a few materials, you can turn plain jars into beautiful home décor. Whether you want a cozy candle holder, a holiday centerpiece, or a unique gift, mason jars can do it all.
In this article, we will show you easy tutorials to decorate mason jars. These step-by-step guides are perfect for beginners and only take a little time to complete. Let’s get started and bring some creativity into your home!
Materials:
- Mason Jars (various sizes)
- Frosted Glass Spray Paint or Epsom salt & Mod Podge for a textured frosted look
- Twine or Jute String
- Artificial Pine Branches (small sprigs)
- Small Red Berries (artificial, for decoration)
- Pine Cones (small)
- Hot Glue Gun and Glue Sticks
- LED Tea Light Candles (battery-operated)
- Wooden Slice (for the base, optional)
- Scissors
- Glitter (optional, to add sparkle to the frosted jars)
Instructions:
Step 1: Prepare the Mason Jars
Clean and dry the mason jars thoroughly to remove any dust or oil that could interfere with the adhesion of paint or glue.
Step 2: Create the Frosted Effect
Option 1: Frosted Spray Paint
Take the jars outside or to a well-ventilated area. Evenly coat the outside of the jars with frosted glass spray paint. Hold the can 6-8 inches from the jar for best results. Apply a second coat if necessary, and let it dry completely.
Option 2: Epsom Salt & Mod Podge
Apply a layer of Mod Podge around the exterior of the jars. Sprinkle Epsom salt onto the jar until it is fully coated to achieve a frosted, snow-like effect. Optionally, sprinkle a little glitter over the salt for added shimmer. Let dry completely.
See also Kickstart Your Woodworking Journey With 25 Beginner-Friendly Projects
Step 3: Decorate the Jars
Wrap the Twine:
Once the jars are dry, wrap twine or jute string around the neck of each jar 3-4 times and tie it into a bow at the front. Leave some excess string for a rustic touch.
Attach Pine Sprigs and Berries:
Using the hot glue gun, attach small artificial pine branches and red berries beneath the twine bow. You can arrange them symmetrically or add a few random accents for a more natural look.
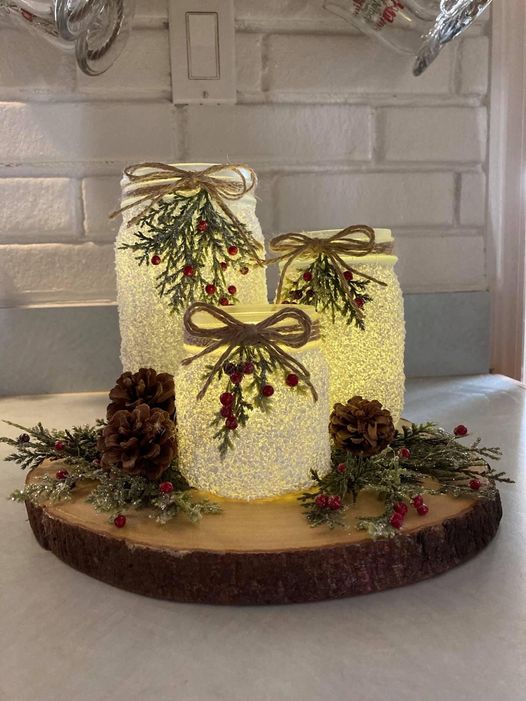
Step 4: Add the Pine Cones and Greenery to the Base
If you’re using a wooden slice as a base (as shown in the image), decorate it by gluing small pine cones, additional artificial greenery, and berries around the edges of the base. Make sure there’s enough space in the center for your mason jars to sit.
Step 5: Insert LED Tea Lights
Place battery-operated LED tea lights inside each mason jar. These provide a soft, warm glow without the fire hazard of traditional candles.
Step 6: Arrange and Display
Arrange the jars on the wooden slice or any other base of your choice. Group them in varying heights for a visually pleasing effect. Turn on the LED lights inside the jars, and enjoy your handmade rustic holiday décor!
Optional Additions:
You could also use colored glass paint for a different look. Personalize the jars by adding stencils or festive stickers before frosting them.
By following these steps, you will create a charming and cozy DIY mason jar decoration perfect for the holidays or as a rustic centerpiece.


